How to Perform Site Audit
Before performing a page audit, make sure you have sufficient balance to perform this action. The total cost is calculated based on the number of pages you enter in the settings. If in the process of crawling pages less than the set amount, we will refund your balance.
Check out the guideline we've put together below to help you audit your pages in Sequence.
Access Site Audit Menu
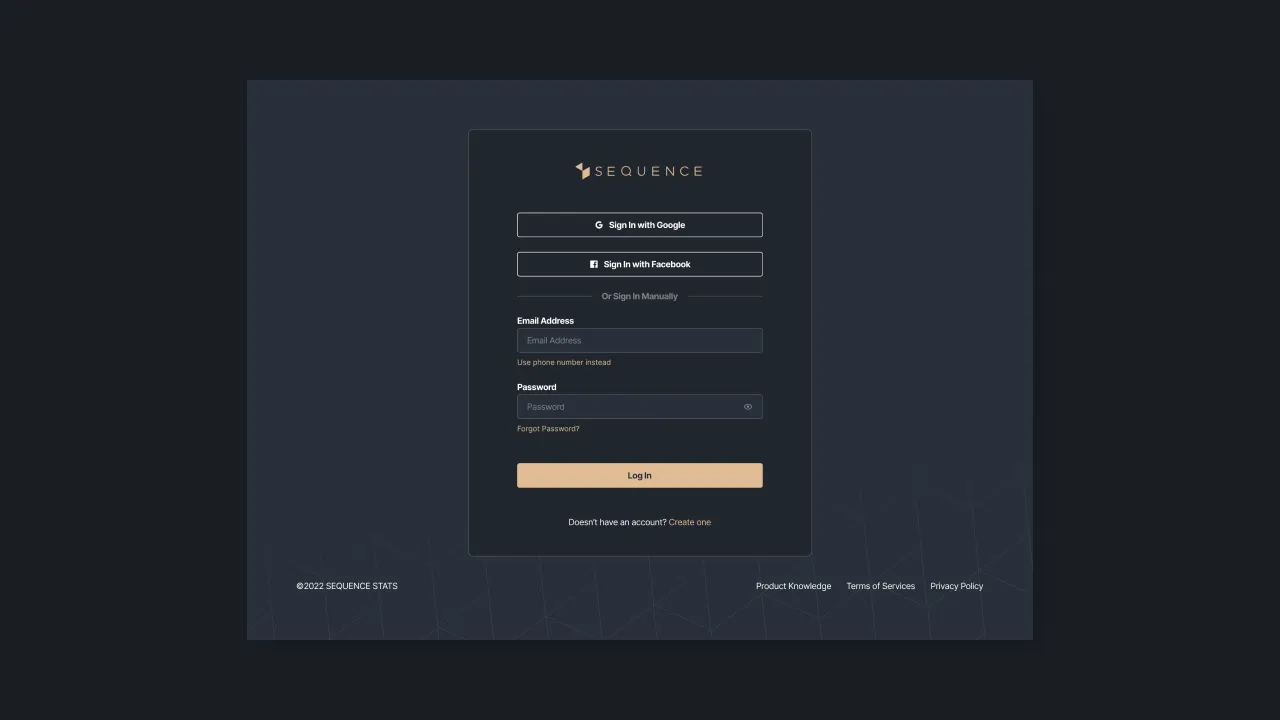
First of all the user must log in to the Sequence account. If the login is successful, the system will display a list of the teams belonging to the user. Select a team to display the dashboard page rank.
 |
|---|
| Figure 1 - Display of the login form |
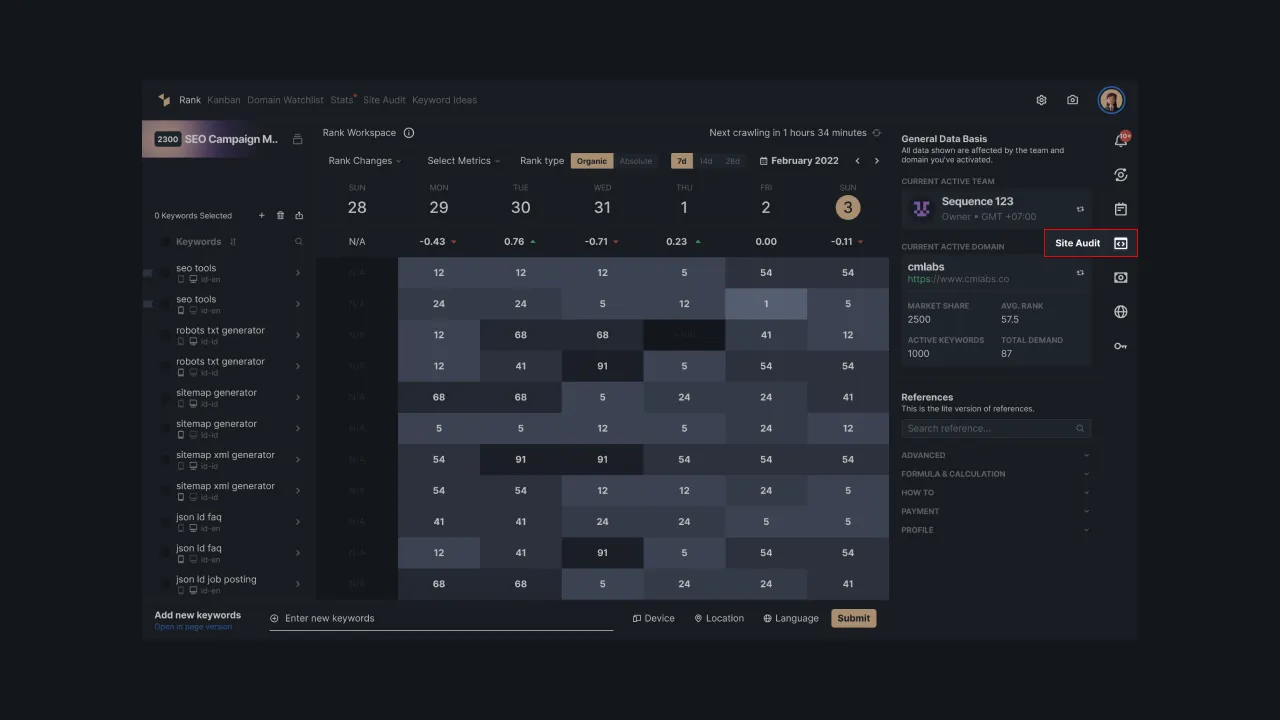
Click the Site Audit on the right side of the rank dashboard page to perform an audit. On that page, you will see the history of page audits and you can perform actions such as changing teams, performing audited site searches, viewing archived page audit data, to auditing new pages.
 |
|---|
| Figure 2 - Site Audit Menu Sidebar |
Add New Site Audit
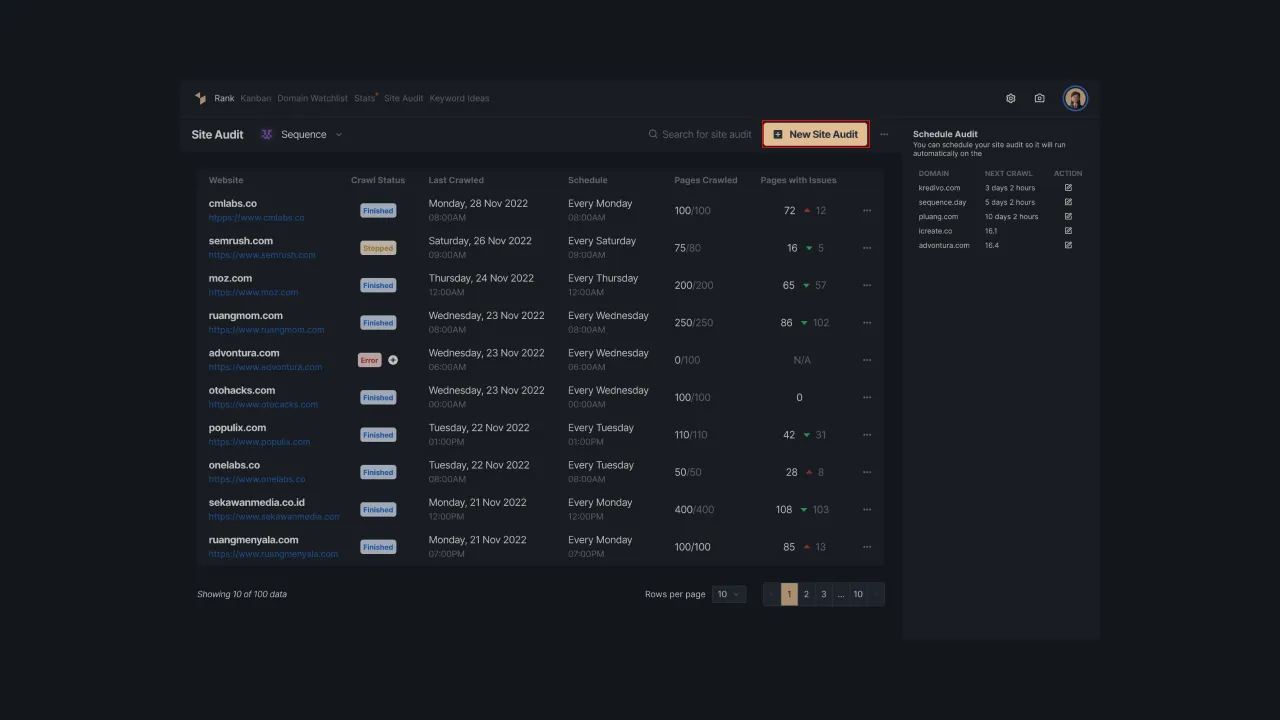
To audit a page, please select the “Add New Site Audit” option at the top page. After the user presses the button, the system then displays a form that must be filled in to continue the page audit process.
 |
|---|
| Figure 3 - Site Audit Button |
Domain Setup
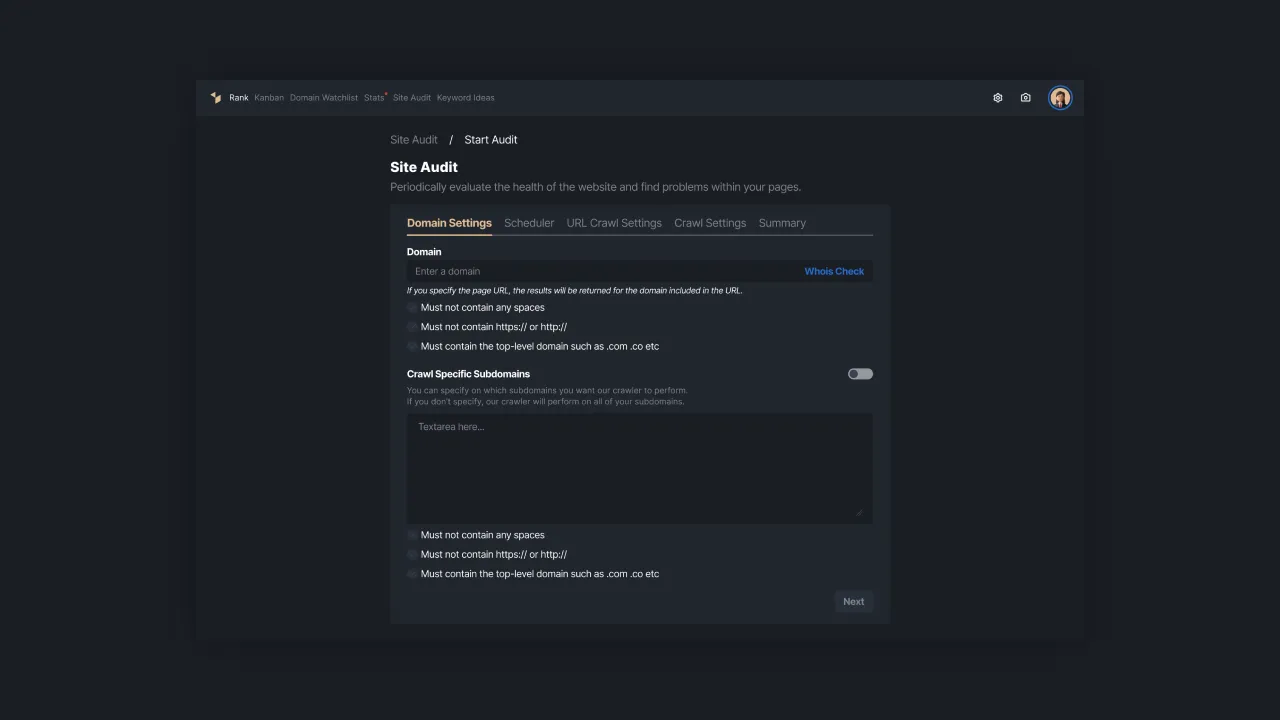
The data that is added first is the domain. You need to set a domain address to perform a page audit. In addition, you also need to specify a subdomain address, otherwise, Sequence will fetch data from all your subdomains for auditing.
 |
|---|
| Figure 4 - Domain Settings |
Setup Audit Scheduling
After setting up your domain, you will need to schedule Site Audit. If you want to schedule site audits regularly, you can activate them via the toggle switch. Then, please select the site audit frequency such as daily, weekly, or monthly. You can also set the site audit time according to your wishes.
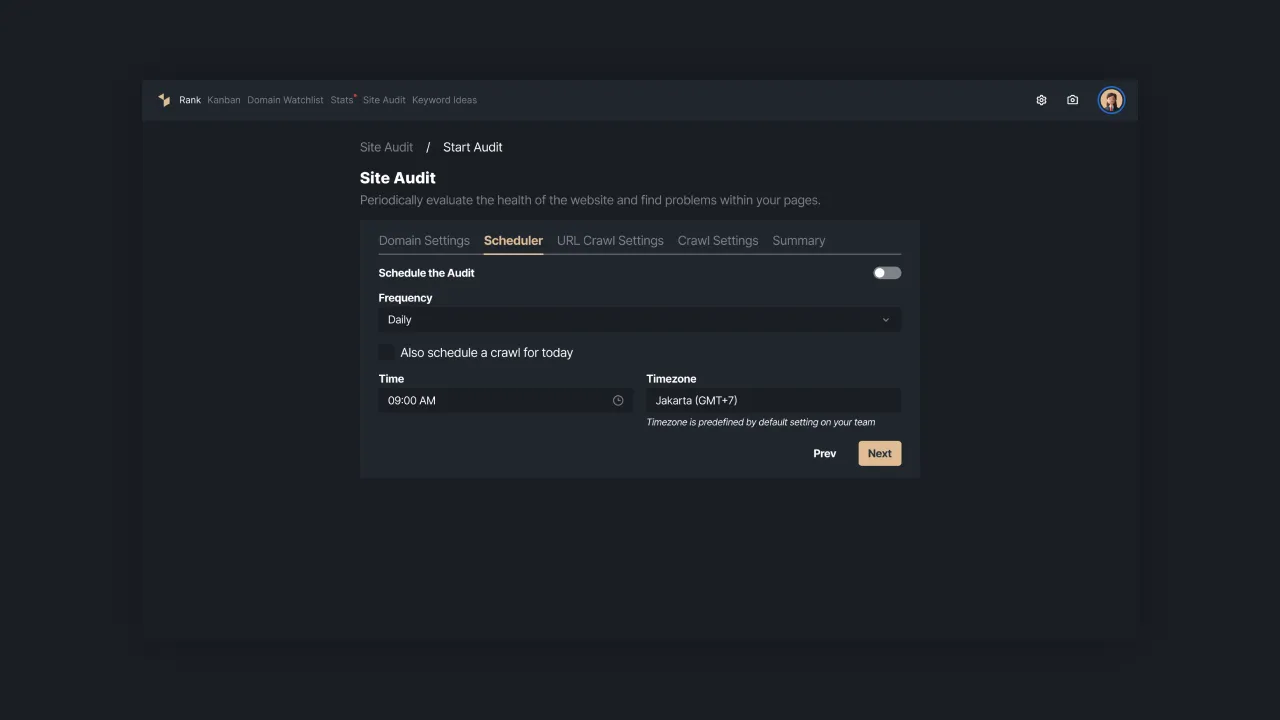 |
|---|
| Figure 5: Scheduling settings |
Prioritize URLs
Next, make settings to prioritize the URLs to be audited. You only need to enter the URL address to be crawled first during the crawl process and can add up to 20 priority URLs to be tracked first.
Turn on the Lighthouse option if you want to crawl using Google Lighthouse and get more information.
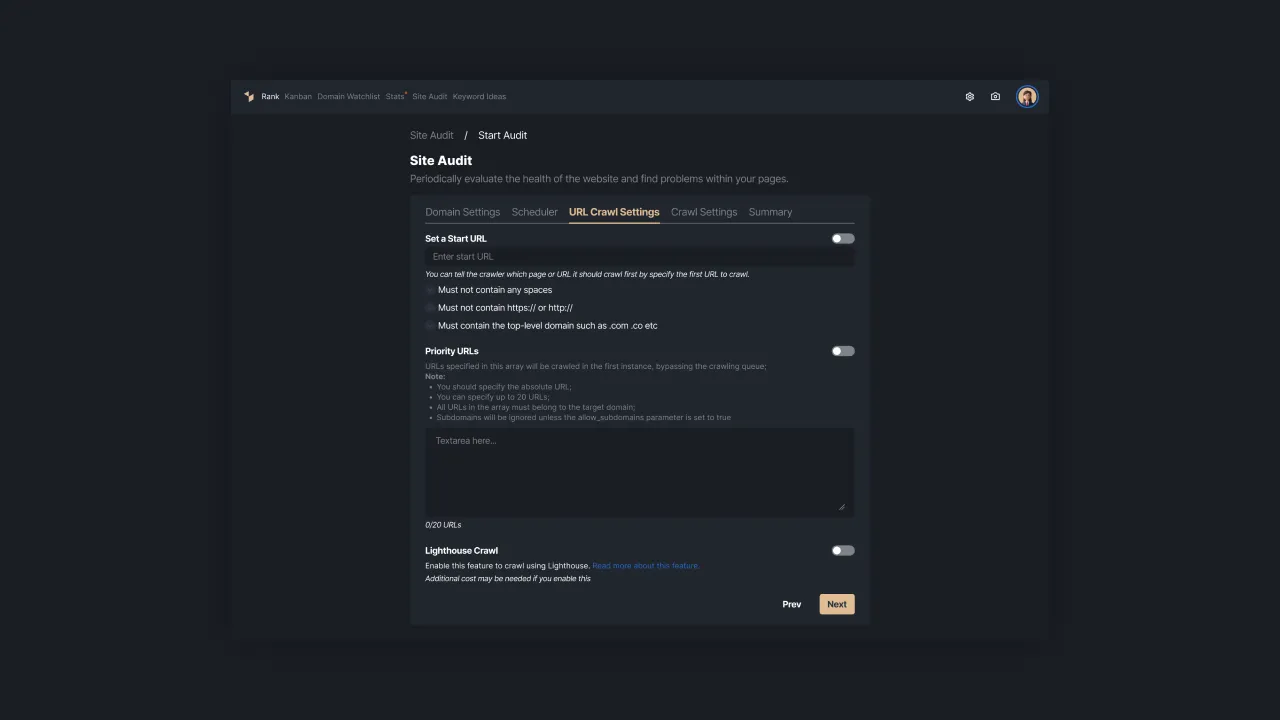 |
|---|
| Figure 6 - URL crawl setting |
Setting The Crawler
After that, you can enter crawler parameters by filling in the number of pages to be crawled, the depth of the links to be crawled (up to a maximum of 10 link depths), setting the crawl delay, and specifying the user-agent or type of bot assigned to perform the process. the crawl.
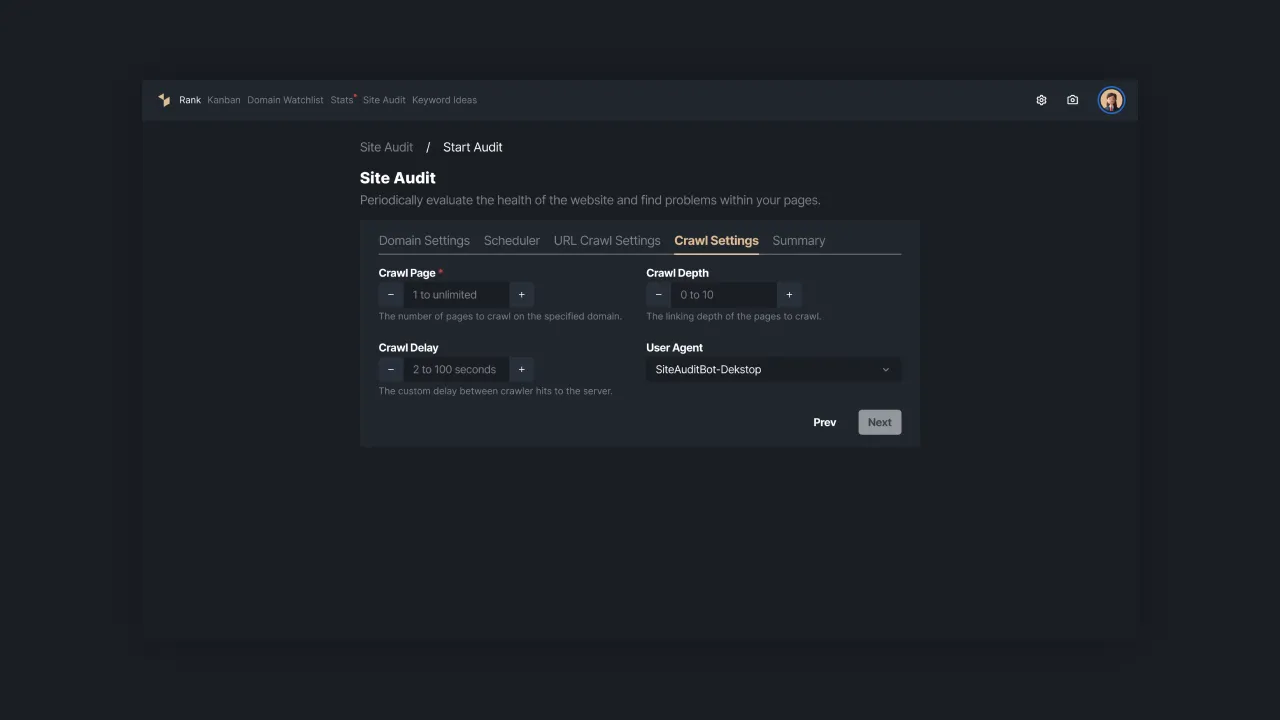 |
|---|
| Figure 7 - Crawl Settings |
Summary and Payment
If the page audit setup form is filled out, you'll see the total audit fee as well as a summary of the predefined domain and crawl settings. You can change these settings by pressing the “Go Back” button.
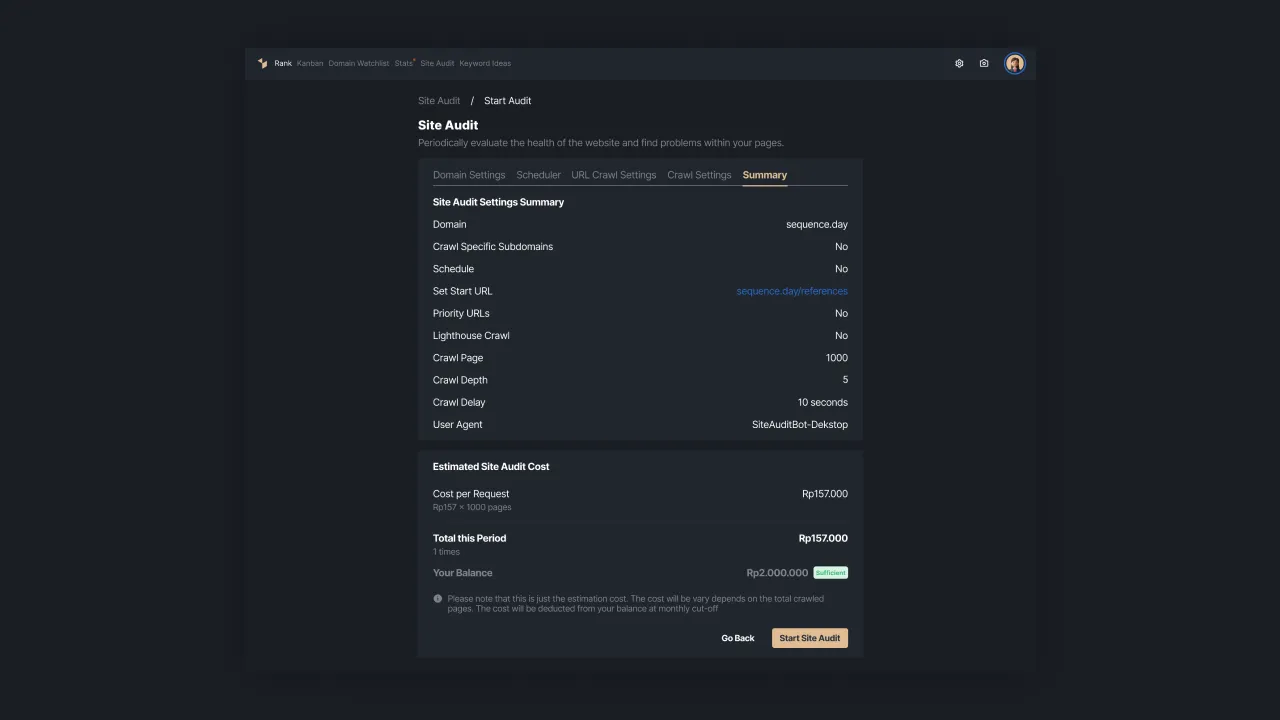 |
|---|
| Figure 8 - Summary of Audit Fees and Arrangements Page |
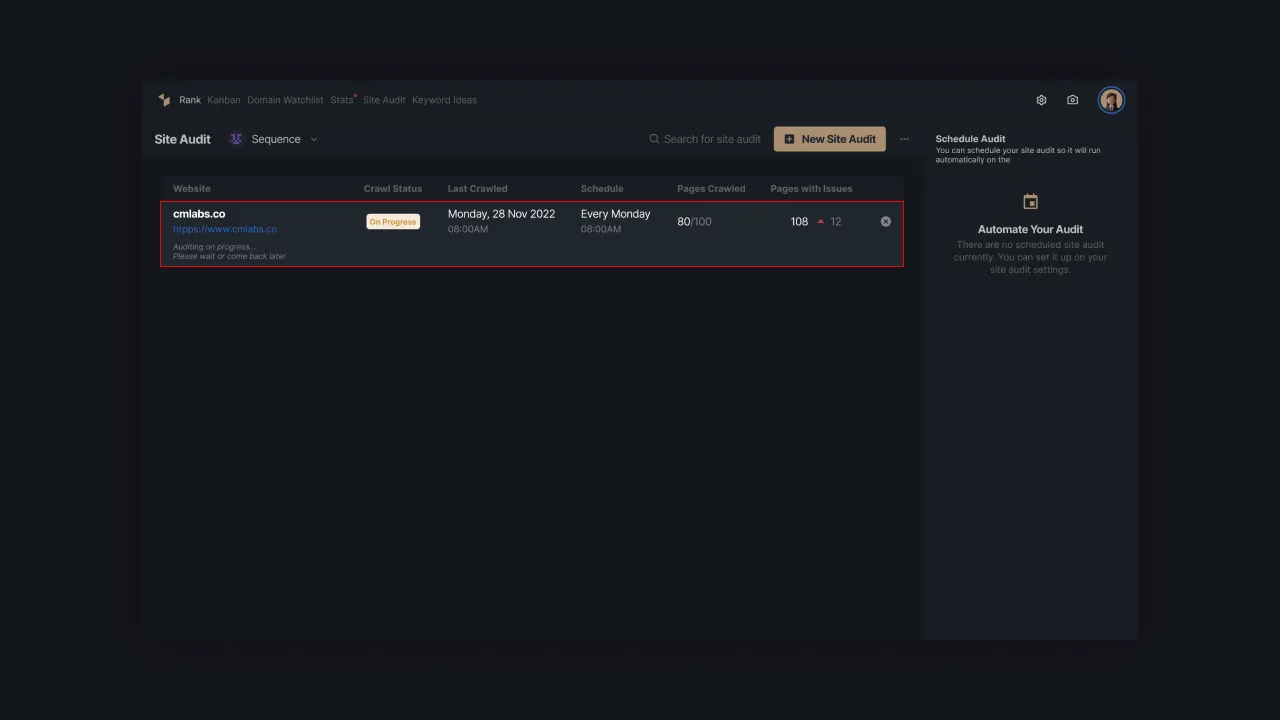
If there are no further changes to the crawling settings, please press the “Start Site Audit” button to start the page audit. Our system will immediately audit the page at the URL you have set. Wait until the audit process is complete, we will send a notification to your email when the audit is complete.
 |
|---|
| Figure 9 - Page Audit Process |
Access Site Audit History
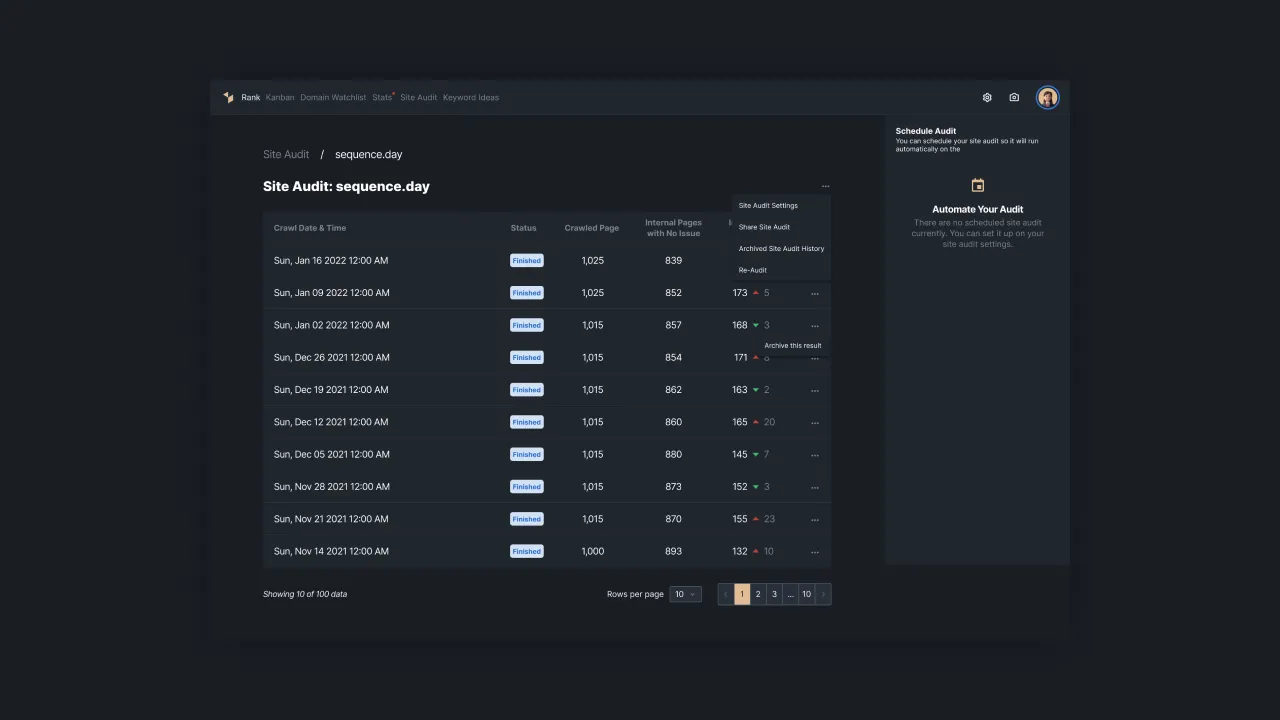
When the audit process is complete, the page audit report will be saved in your page audit history. We present summary reports as well as detailed reports regarding issues affecting the health of your website. You can access the report by pressing the website name on the audit history table page.
 |
|---|
| Figure 10 - Page Audit History |
Those are the steps you can take to audit a page and its subdomains using Sequence. Check the health of the website regularly to maintain its performance and improve the SEO of your website.